Overview
After a project request is approved during the Capture Gate review, the Investment Portfolio Manager or Product/Service Owner assigns it to a Definition Project Manager. The Definition Project Manager works with Subject Matter Experts to complete the Definition Stage. This gives the Service Portfolio Owner an investment proposal which can be used to make a decision about committing ITS resources to fulfill the request or not.
These activities are associated with the planning, scoping and effort estimation that occur before a project is approved. With one exception, all project definition effort should be tracked as ITS Demand Management Activities as Authorized work. The exception is if the planning effort for a project is expected to take more than 80 hours. In that case, a separate planning project is created and the Definition Project Manager allocates staff who will be involved with the planning work.
Note: For information on the associated business rules, see the Definition Stage Procedures for Project Managers.
Checklist
This checklist is completed by the Definition Project Manager during the Definition Stage of Demand Management. It helps ensure that all deliverables are completed properly in preparation for the Definition Gate review. This creates a consistent approach for the Execution Project Manager.
- Ensure that Project Title (Description in Planview) is understandable from non-IT perspective (no acronyms, jargon, etc.). Communicate with sponsor to change the title.
- Include all relevant information in the project charge.
- Contact Service Transition Planning and Support to determine if Service Transition Planning & Support (STPS) tasks are required. For example update to SLE (Service Level Expectations).
- Confirm with ITS Support Services Lead Team if their involvement is needed.
- Check the Planview Common Definition Demand Details Screen. If an Enterprise Architect Coach is listed, contact that person. If no Enterprise Architect Coach is listed, and the Enterprise Arch Involvement status is something other than "No Involvement Needed", then contact the Enterprise Architects.
- Ensure that the project Work Breakdown Structure (WBS) has tasks relevant to the project work. Add tasks as needed.
- Include all estimated effort by role as requirement (Require in Planview) at the PLAN level.
Note: Review Define a Resource Requirement.
- Make sure that the estimated project management effort is between 10-20% of the total (lower end for repeatable, low risk projects).
- Include all estimated effort by role as requirement (Require in Planview) at the PLAN level.
- Ensure that the financial plan has been updated with non-labor data as needed (expenses, $ benefits).
Definition Demand Details
- On your notifications home page (Total), click Enter Common Definition Demand Details next to the project under Work Lifecycle.
- Complete the the Definition Project Manager fields.
Note:
- Hover over field titles, in gray, to display definitions.
- If Enterprise Architect (EA) involvement is needed, notify the EA Coach that you are the project manager.
- Involve IIA if project or proposed solution stores sensitive data, and review security/authentication and Identity and Access Management (IAM).
- Click Save.
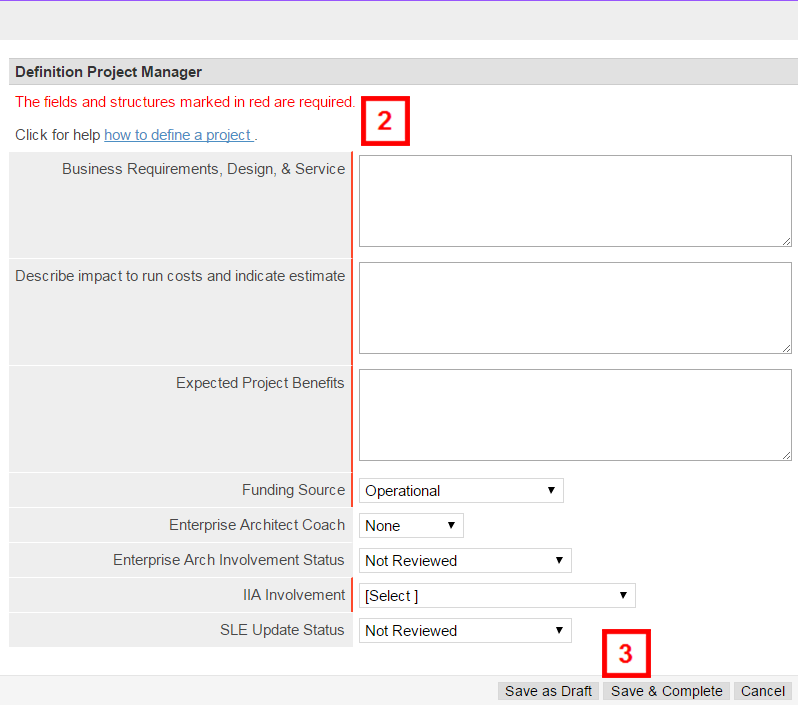
Tip Refer to the Identifying Project Benefits and the Identifying IT Metrics docs for help with completing this page.
Project Schedule
- Click Create Schedule in the pop-up window.
Note: This navigates to Work and Resource Management where a work breakdown structure template has been assigned.
- Verify that the column set is Schedule Entry – Corporate.
- Modify tasks as needed and assign dates to Milestones based on the Scheduled Start date. Milestones are identified by Yes in the Milestone Flag column.
Note:
- Double-click in the non-shaded fields to edit.
- Click out of the row to update the schedule.
- Milestones have a 0 duration.
- To add requirements, see Define a Resource Requirement and enter effort needed to complete the project scope.
Caution: Avoid special characters in the requirement name
Note:
- Resource Portfolio Managers can assist with determining role titles.
- Enter required effort by role before proceeding. The requirements are used in the baseline project plan and to create a financial plan that estimates labor cost
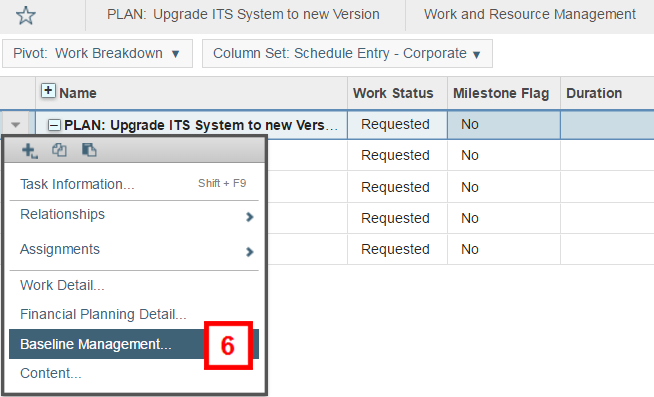
- Verify that the dates are still accurate.
- When finished, select Baseline Summary from the drop-down list to the left of the plan row.
- Click Create New Baseline, enter Definition Baseline in the Name field, and then click Save.
- Close the Baseline Summary window.
- Close the Work and Resource Management window.
- Click Submit schedule as complete in the other, pop-up, window.
Note: This opens the Financial Plan window.
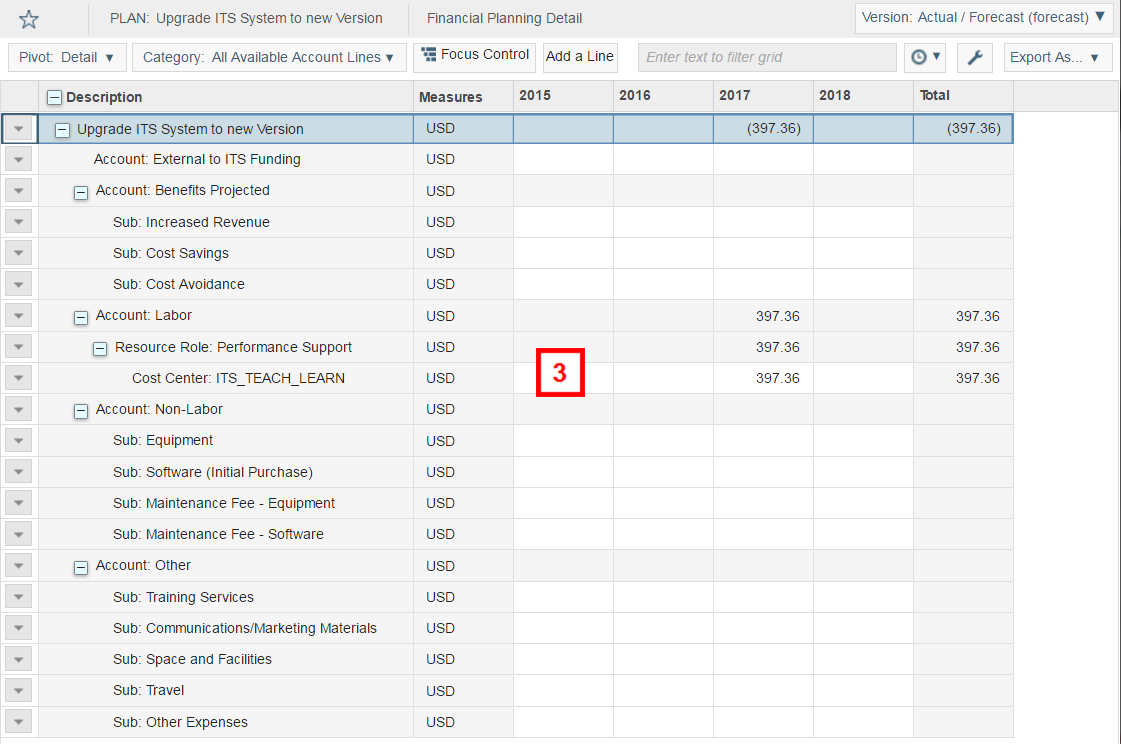
Financial Plan
- Click Load.
Note: The default display for dollar amount is set to thousands. This can be changed with the My Account drop-down list on the Preferences page.
- Verify the Effort to Load and Period Ranges, and then click Load Now.
Note: Labor cost rates per role are set by ITS Finance at the 75th percentile of the salary range for people in the role. This is the full labor cost, including taxes and benefits.
- Enter dollar amounts in the appropriate financial period for:
- Funding external to ITS that will be received for the requested project.
- Increased revenue or cost savings that will be achieved as a result of the project.
- Non-labor and other costs.
Note:
- Projected benefits are realized upon project completion. Enter benefits for every financial period after expected project completion.
- Enter expected expenses related to the project execution, not costs to run the service.
- Click Total & Save to validate the numbers.
- Click Save & Close.
- Click OK.
Note: The Common Definition Demand Details screen now opens. If you do not complete this step now, you can do so later with the notification on the My Planview screen.
- Select Approve Screen and enter your comments, if any.
- Click OK to submit definition as complete.
The next step calculates the total labor cost for the request and is where non-labor expenses and expected monetary benefits (savings, cost avoidance, increased revenue) need to be entered. The Service Portfolio Owner uses this information for cost benefit analysis in the decision to approve the project. Include all expected effort as requirements, reserves or allocations.