Overview
The first step in designing a template is to design or copy a layout and background. This is done outside of Content Manager. Most units prefer to use Photoshop to create a layout that is appealing. Several examples of these layouts are available for others to use at the following path: \\dsw-common.m.storage.umich.edu\dsw-common\SharedContent\Templates (This location includes both Photoshop and .jpg files for use on signs.)
When using a pre-created template background or when creating a new one, users should consider the dimensions of the display (horizontal or vertical, resolution).This information will determine what is available for use on the sign. When designing a template background from scratch, units should decide where data will be placed, as well as how to make the design easy to read and accessible to all. For a complete list of helpful ideas and best practices, please visit the Digital Signage website.
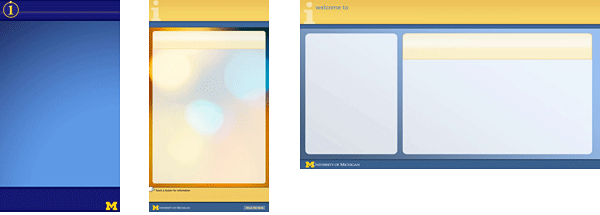
Once the background is designed, it can be placed in the template. Here are some examples of layout and background images:
Configuring a Template
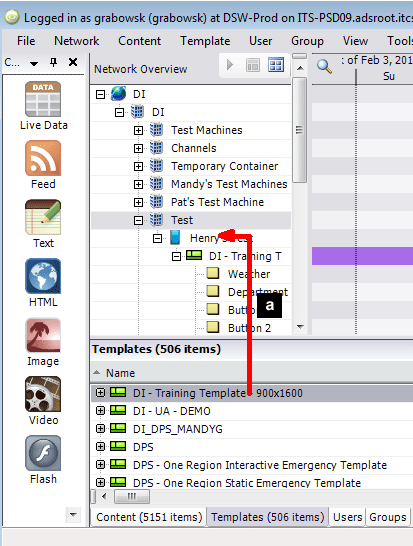
- Launch Content Manager and open your connection
- From the Template menu, select New.
Note The Template Editor window will appear, and in it, you will also see a Region List.

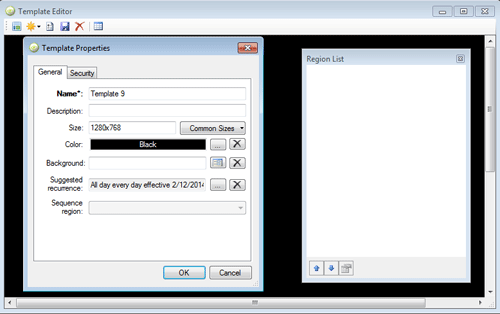
In the Template Properties window, there are several fields that need to be configured, including one for the background image you’ve designed or copied:
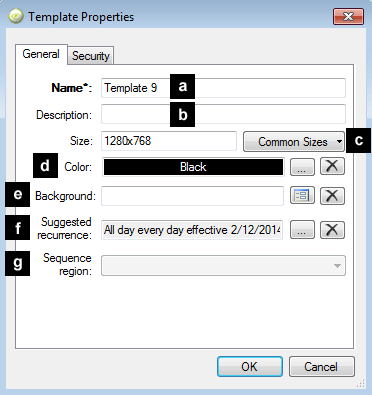
- Name
- This is the name of the template. Use the naming convention of “Unit Prefix-Template Name”
- Description
- This section is used to describe the template briefly to easily identify it later.
- Size
- This is the resolution of the layout. There are several common sizes available in the pull down menu for quick selection.
- Color
- If you do not wish to use a background image, the background can be set to a static color using this option.
- Background
- This section contains the path to the background image created or copied earlier. Using the icon to the right, the dynamic URL button allows you to browse the background images using Windows Explorer.
- Suggested Recurrence
- Controls when the template is played on the player. This field offers a default value whenever the template is used, but can be changed.
- Sequence Region
- This section allows you to select a sequence region. (Note: this is grayed out if no regions have been created.)
Adding Regions to a Template
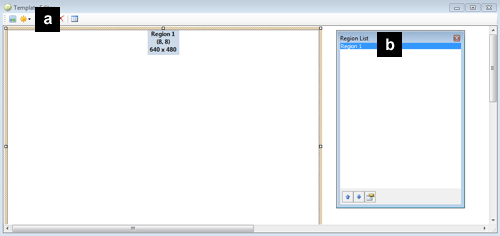
- Create a new Region using the yellow star icon. A default region will be created (640 x 480).
- To edit the region properties, double-click the Region you just created (Region 1), or highlight it in the region list window and click the properties button. You can also adjust the size of the region by clicking and dragging the key points along the frame of the region.
In the Region Properties window, there are several fields that need to be configured:
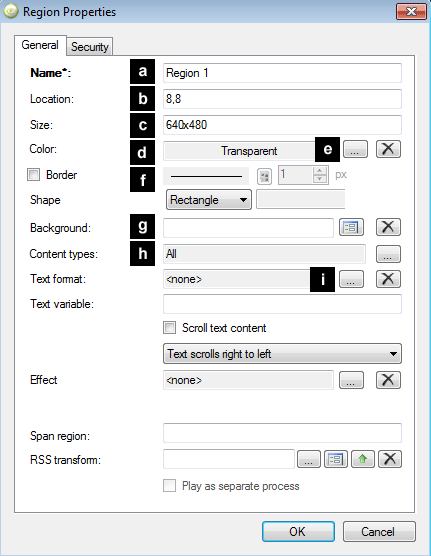
- Name
- Name the region for easy identification later.
- Location
- X, Y coordinate of the upper left corner of the region.
- Size
- X by Y pixel dimensions of the region.
- Color
- This can set a static background color for a region (default is transparent).
- Opacity
- Designates if the region is see-through or not when a color is chosen.
- Border
- Adds a border to the region. If a border is checked, a color selector and width field becomes available.
- Background
- Use this section to add a background image to the region itself. Using the icon to the right, a dynamic URL can be used to browse an image file.
- Content Types
- Use this to restrict what types of content can be played in the region.
- Text Format
- Text styling for regions that only hold text (such as titles and tickers) is controlled by the region itself. Text objects do not have a formatting button included. Use this section to control the size, font, color, and attributes of the font within the region. The checkbox is available if the text within the region scrolls like a ticker.
Note The ticker speed is controlled by the player object itself, and it can be changed by right-clicking the player and choosing Properties.
Note For regions that overlap, there is a z-index. Right-clicking any region will give the option to “Bring to Front” or “Send to Back.” Each region can also easily be duplicated by right-clicking. Use this method to create several regions of equal size.
Saving Your Template and Placing a Template on a Screen
Once your template contains all required regions, click Save to return to the Content Manager.
Place the template on the screen. There are two ways to do this:
- Drag the template from the template list (at the bottom of the Content Manager screen) to the Player machine in the Network Overview. This will place the template directly on the player.
- Drag the template from the template list to a Playlist for the associate player machines.