
Overview
This document provides instructions for configuring email clients to use ITS's authenticated SMTP server (smtp.mail.umich.edu). This service is an alternative to using your regular mail account for correspondence with those whose university business needs are not met by the latter.
General Configuration Information
Use smtp.mail.umich.edu for the outgoing (SMTP) mail server and use SSL for authentication.
Apple's Mail Application
-
From the Mail menu, select Preferences.
-
Click the Accounts button.
-
In the list of accounts on the left side of the window, select the account you want to modify, and the configuration information will appear to the right. If you prefer, you can click the + sign to create a new account.
-
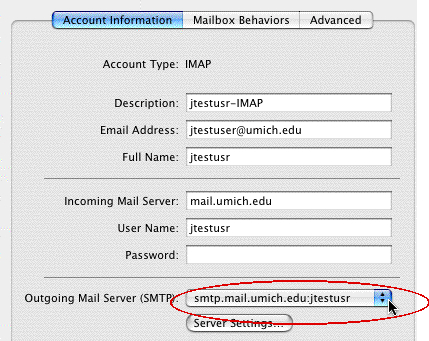
Under the Account Information tab, click the Server Settings button at the bottom of the window. Do not change your current Account Type setting. An old ITCS IMAP account is shown here; you may be using a different account.

-
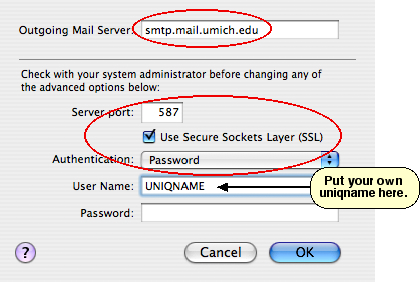
In the dialog box that opens, enter these settings:
In the Outgoing Mail Server box, type smtp.mail.umich.edu.
Type 587 for the Server port.
Check the Use Secure Sockets Layer (SSL) checkbox.
From the Authentication pop-up menu, select Password.
In the User Name box, enter your uniqname.
Click OK.
-
Apple's Mail Application sometimes reverts to its old SMTP settings, so we recommend that you remove any old SMTP server entries. Click the pop-up menu for Outgoing Mail Server (SMTP).
-
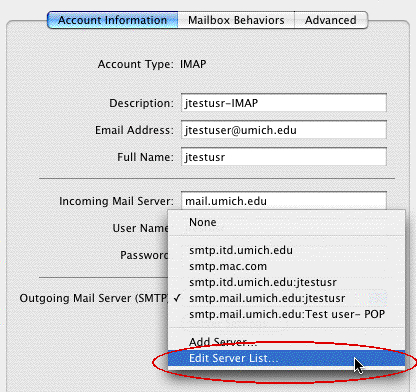
From this pop-up menu, select Edit Server List.
-
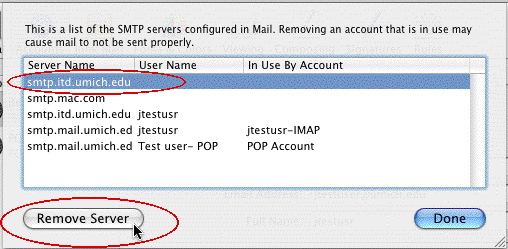
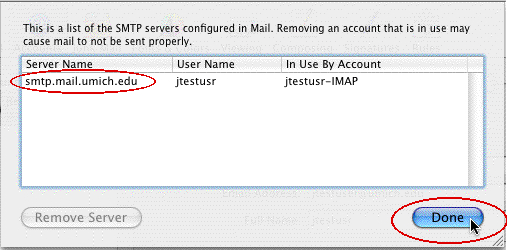
Select a server that you do not use, then click the Remove Server button. Continue until you have removed all the servers you don't use.
-
The only server in your list should be smtp.mail.umich.edu (your uniqname may appear next to the server name; that's okay). When you have only the smtp.mail.umich.edu server in the list, click the Done button.
-
Close the Accounts window and, when prompted to do so, save your changes.
Outlook
-
From the Tools menu, select E-mail Accounts.
-
In the Email Accounts window, select View or change existing email accounts. (If you are creating a new account, provide the same setting information listed below.)
-
Click Next.
-
From the list of email accounts, click the name of the account you wish to use so that it is highlighted, then click Change. An old ITCS IMAP account is shown here; you may be using a different account.
-
Make this setting:
For Outgoing mail server (SMTP), enter smtp.mail.umich.edu.
Then click the More Settings button.

-
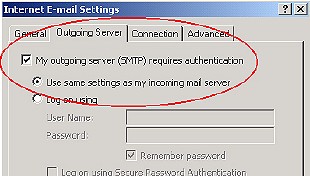
Click the Outgoing Server tab.
Check the My outgoing server (SMTP) requires authentication checkbox.
Also make sure the Use same settings as my incoming mail server radio button is selected.
-
Click the Advanced tab. Under the Outgoing server (SMTP) heading, check the This server requires a secure connection (SSL) checkbox. The port number should be 465.

-
Click the OK button.
-
In the Email Accounts window, click the Next button.
-
Click the Finish button.
-
Restart Outlook to make sure the new settings take effect.
Outlook Express v6
-
From the Tools menu, select Accounts.
-
In the Internet Accounts window, click the Mail tab.
-
In the list of Accounts, click the name of the account you want to use so that it is highlighted, then click the Properties button. An old ITCS IMAP account is shown here; you may be using a different account.
-
In the Properties window, click the Servers tab, and make these settings:
In the Outgoing mail (SMTP) box, type smtp.mail.umich.edu.
Under Outgoing Mail Server, check the My server requires authentication checkbox.

-
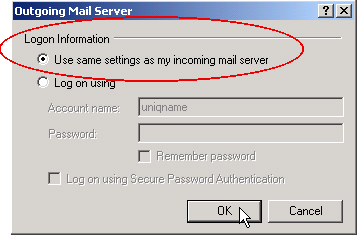
Click the Settings button (under Outgoing Mail Server).
-
Make sure that under Logon Information, the Use same settings as my incoming mail server radio button is selected. Then click OK.
-
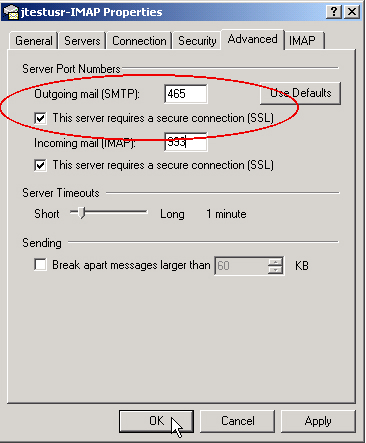
Click the Advanced tab, and make these settings:
Under Outgoing mail (SMTP), check the This server requires a secure connection (SSL) checkbox.
The Outgoing mail (SMTP) port number should be 465.
-
Click the OK button.
-
In the Internet Accounts window, click the Close button.
Troubleshooting
If you are unable to send mail after changing your settings, here are some things to try:
-
Check your settings:
-
The SMTP/outgoing mail server should be smtp.mail.umich.edu.
-
Authentication is required.
-
SSL must be used. (Note that TLS is a form of SSL. In some programs, we recommend that you select TLS.)
-
The port number for SMTP should be either 465 (used by most Microsoft mail programs) or 587 (used by most non-Microsoft mail programs).
-
-
Try switching the port number. Sometimes this helps. If you entered 465, try 587 instead. If you entered 587, try 465.
-
If you are running personal firewall software or anti-virus software other than the versions of VirusScan for Windows or Sophos Anti-Virus for Mac that ITS distributes, it is possible that your security software is blocking port 465 or 587. Try disabling that software, then testing again. If this is indeed the cause, set your security software so that it does not block those ports.
-
If you are using an ISP other than U-M (for example, Comcast, APL, SBC, etc.), your ISP may be blocking access to ITS's SMTP server. In that case, you must use your ISP's recommended SMTP server settings. Check your ISP's website or contact your ISP for instructions and assistance.