Overview
This document provides instructions for using Mfile to access your AFS home directory. With Mfile, you can manage or store files from any computer with an Internet connection and web browser.
Note Your web browser must have JavaScript enabled for MFile to work properly. Also, the screenshots in this document were made using Mozilla Firefox on a Macintosh. If you are using a different web browser with a different operating system, some of the screenshots may not render properly.
Navigating to MFile
-
Enter the following address in your web browser, then click the log in button:
http://mfile.umich.edu/ -
Log in with your uniqname and UMICH Kerberos password.
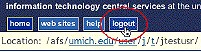
Important Remember to log out when you are finished. Logging out when you are done protects your privacy and the security of your online information.
Getting Around in MFile
Basic Navigation
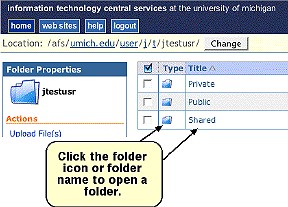
To open a folder: Click the folder icon next to the folder name or click the folder name.
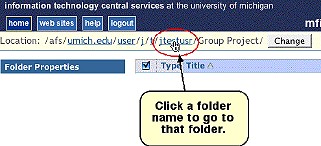
Using the Location Line
You can connect to other parts of AFS by using the Location line at the top of the window. Click any folder name in the path to go to that folder.
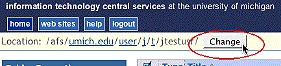
Entering a Pathname
You can also enter a specific pathname if you know one. Here's how:
-
To the far right of the Location line, click the Change button.
-
In the box that appears, type the pathname, then click the Go button.

Returning to Your Home Directory
You can get back to your home directory at any time by clicking the Home button.
Uploading Files to Your Home Directory
-
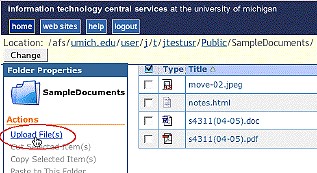
Open your file's destination folder- the folder you are transferring your file to.
-
In the Actions list, click Upload File(s).
-
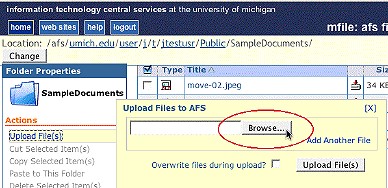
In the Upload Files to AFS pane, click the Browse button.
-
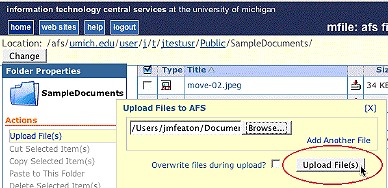
Find the file you want to upload, and click Open. The path to the file on your computer will appear in the box next to the Browse button.
-
Click the Upload File(s) button.
Tip If the file you are uploading has the same name as a file that is already in AFS, and you want the new copy to replace the older copy, check the Overwrite files during upload? checkbox before you click the Upload File(s) button.
-
A copy of the file will be uploaded to your AFS home directory.
Reading/Viewing Files in Your Home Directory
Only the following file types can be displayed in your web browser:
|
jpeg image |
gif image |
png image |
mpeg video |
QuickTime video |
|
mpeg audio |
X-Shockwave-Flash |
mp3 audio |
aif audio |
text files (e.g., html, plain text, c, php) |
Viewing these files:
-
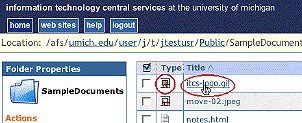
Navigate to the file in your home directory that you want to look at or read.
-
To view the file in your web browser, click the File Type icon (to the left of the file name) or the file name.
-
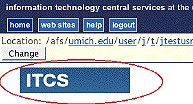
The file will be displayed. (In this example, the file is a gif image.) You cannot make changes to the file while you are viewing it, but you can still copy/paste its contents.
Note If you try to display a file that your web browser does not know how to display, such as a Microsoft Word file, you will see this error message:
-
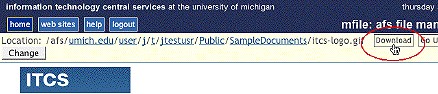
If you would like to download a copy of the file to your computer, click the Download button. Your web browser will then open a dialog box with several options. Select the option that saves the file to your computer.
Downloading Files From Your Home Directory
-
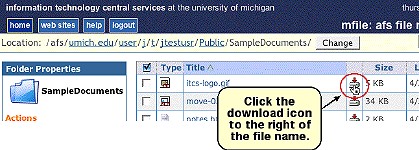
In your home directory, navigate to the file that you wish to download.
-
Click the download icon to the right of the file name. (Note that clicking the file name will display rather than download the file—if the file is a displayable file type.)
-
Your web browser will open a dialog box with several options. Select the option that saves the file to your computer.
Moving Files and Folders Within Your Home Directory
Note You cannot move files and folders within your home directory the way you can on your computer—by dragging and dropping them. Instead, you must copy (or cut) and paste them. You can copy (or cut) and paste individual files as well as folders that containing other folders or files.
-
Navigate to the file(s) and/or folder(s) that you want to move. You can move multiple files and folders at the same time.
-
Indicate the items you want to move by checking the checkboxes next to them, then click either the Copy Selected Item(s) or Cut Selected Item(s) link.
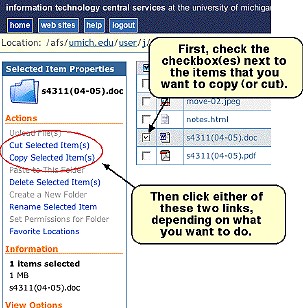
The checkmark next to the item you selected will disappear after you click the link.
-
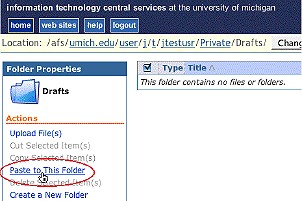
Navigate to your item's destination folder, or the folder you will be copying to.
-
With that folder open, click the Paste to This Folder link.
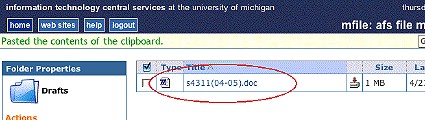
-
The item will appear in the list of items for the folder you have open.
Deleting a File From Your Home Directory
-
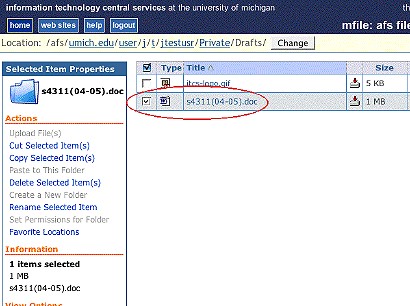
Navigate to the file or folder you would like to delete.
-
Check the checkbox next to the file or folder you wish to delete.
-
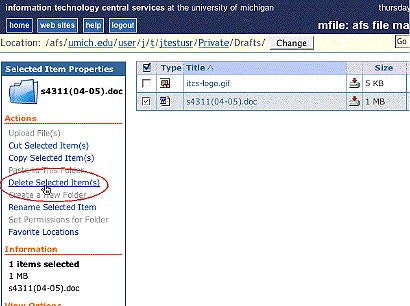
In the Actions list, click the Delete Item(s) link.
-
You will be asked if you are sure you want to delete the item. Click OK.
-
The file or folder will be deleted. Note that if you delete a folder, everything inside the folder will also be deleted.
Renaming a File in Your Home Directory
-
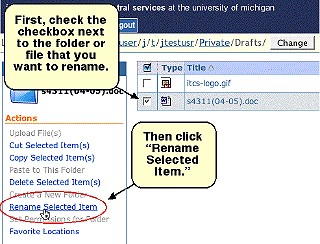
Navigate to the file in your AFS home directory that you would like to rename.
-
Check the checkbox next to the file or folder that you wish to rename, and then click the Rename Selected Item link.
-
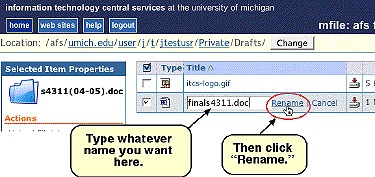
In the text box that appears, type the new file or folder name, then click the Rename link.
-
The file or folder will be renamed.
Publishing Your Website Using Your Home Directory
You can publish a website by putting your website files inside a folder called html inside your Public folder. Your website can then be viewed at this URL:
http://www-personal.umich.edu/~youruniqname/
Subsitute your own uniqname for "youruniqname" above.
You can use the web sites button to set up your webspace and then to get to your html folder quickly.
Creating Space for Your Website
-
Click the web sites button.
-
If you do not yet have an html folder for your web pages, or if there are problems with the permissions for your web pages, you will be prompted to create the space and fix any problems before proceeding.


Check the checkbox(es) next to the names of websites you want to set up, then click the prepare selected web spaces button.
-
Your web space will be set up for you.

Note It is helpful to be able to distinguish between your public and private websites; your public site is published on the web for anyone who wants to view it. Your private site is set up so that only members of the U-M community can view it. They will be prompted to log in with their uniqname and UMICH Kerberos password (or Friend ID and password) before they can see it.
Navigating to Your Website Folder
-
Click the web sites button.
-
Click the name of your web space to go to the folder in your AFS space where your website is published. Put the files for your web pages in that folder to publish them.

Creating a New Folder
-
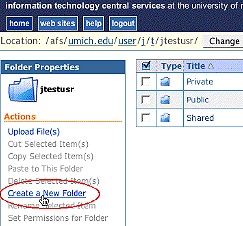
In the Actions list, click Create a New Folder.
-
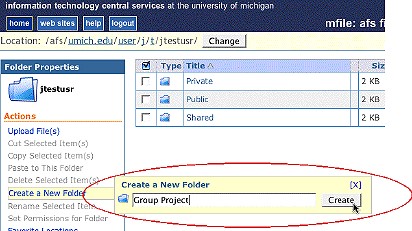
In the Create a New Folder box that opens, type a name for your new folder, and then click the Create button.
Setting Folder Permissions
You can set permissions for the folders inside your home directory. For example, you might create a folder in your AFS home directory that you want to use for a group project. You could then set permissions for that folder to allow only your group members to see what is inside it and make changes.
-
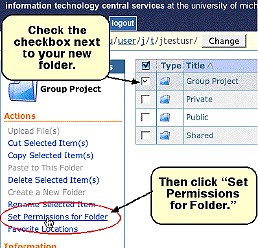
Put a checkmark in the checkbox next to the name of the folder for which you want to set permissions, and then, in the Actions list, click the Set Permissions for Folder link.
-
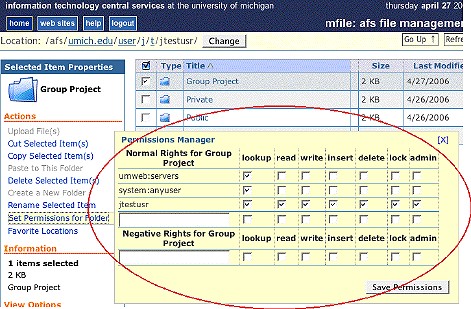
In the Permissions Manager pane that opens, you will see the existing permissions for the folder. In this example, the owner of the folder (jtestusr) has all permissions.
Definitions of permissions:
lookup: If you have lookup access to a folder, you can see the names of documents and folders inside it, but you cannot open and read them. A user must have lookup access rights in order to use any other rights. If, for example, you assigned read rights on a folder to a friend but did not assign lookup rights, your friend would not be able to see the documents in the folder and would therefore not be able to select any to open and read.
read: If you have read access to a folder, you can open and read any document inside that folder (assuming, of course, that you have the right application, such as Word or Excel, to open it).
write: If you have write access to a folder, you can make and save changes to any document it contains.
insert: If you have insert access to a folder, you can add new documents and folders to it.
delete: If you have delete access to a folder, you can delete any documents or folders it contains.
lock: If you have lock access to a folder, you can place read or write limitations on it. This permission is rarely used. It allows you to lock a folder while you are updating a document inside it so that no other user can alter the document until you release the lock.
admin: If you have admin access to a folder, you can change the permissions for it and the folders it contains. You have admin rights for all folders inside your AFS home directory, but you cannot change the access privileges for your home directory itself.
-
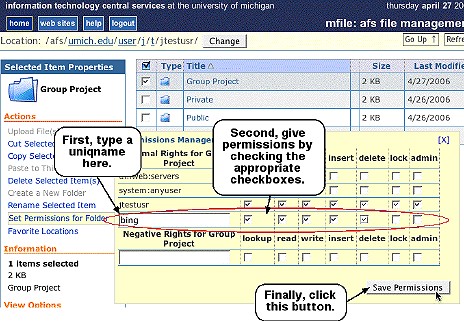
To add someone and set permissions, type the uniqname of the person you want to add in the box at the bottom of the list, set the permissions you want, then click Save Permissions.
-
The new permissions will be added to the list. You can add more people, one at a time. When you are finished setting permissions, close the Permissions Manager pane by clicking the [X] in the upper right corner.
![Screenshot of saved permissions, where to add more people, and the close [X]](http://documentation.its.umich.edu/sites/documentation.its.umich.edu/files/screenshots/ifs/s4311/permission-06.jpeg)
To remove permissions, uncheck the respective check boxes as appropriate. To remove someone entirely from the list of users with permissions for a particular folder, uncheck all the permission boxes next to that person's uniqname, the click the Save Permissions button.
Group permissions. You can give permissions to groups by using pts group names. For details about creating pts groups, see Creating and Using Protection (pts) Groups for AFS.
About negative rights. At the bottom of the Permissions Manager, you will see a section for negative rights. This can be used in conjunction with pts groups. If, for example, you have give access permissions to a pts group, but you want to deny that access to one member of the group, you can use negative rights to do this. When you give someone negative rights to a folder, you are denying them access.
Log Out When You're Done
Important Logging out when you are done protects your privacy and the security of your online information. Be sure to click the Logou button when you are finished using MFile.