
Overview
These steps are for both upgrading an existing installed client and for new client installations. (If you have an older version of the client already installed, the installation wizard installs the product accordingly.)
Requires administrator level permissions. If you are on the MiWorkSpace service, this installation is completed for you by the MiWorkspace team. If you are not on the MiWorkspace service and do not have administrator level permissions to your machine, contact your local IT support team. Even with administrator level permissions, you still need to right-click and run as administrator (step #2 below).
Install the Client
- Download the installation package and extract the executable file.
- Right-click the executable file and select Run as Administrator.
- Click Yes to the prompt.
- If the installer finds an older version of the client, a prompt appears to confirm updating to the newer version. Click Yes.
- Complete the installation.
Note:
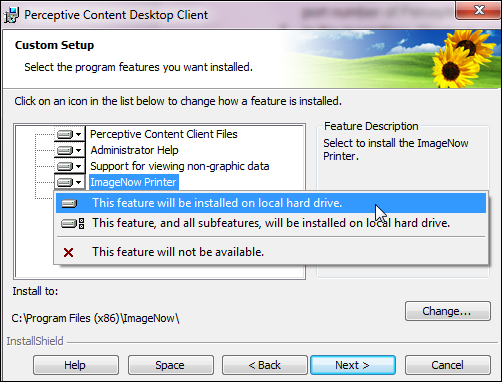
- On the Custom Setup step, make sure that the ImageNow Printer is selected to install.
- Leave the Deployment Server field blank on the Deployment Server step.
- If prompted, enter the following values:
- Name
- Production
- Server
- imagingprod.it.umich.edu
- Port
- 8000
Create a Connection Profile
This is a one-time setup task that is required to access the imaging database. This may also resolve the error “The network connection to imaging server has been disconnected”.
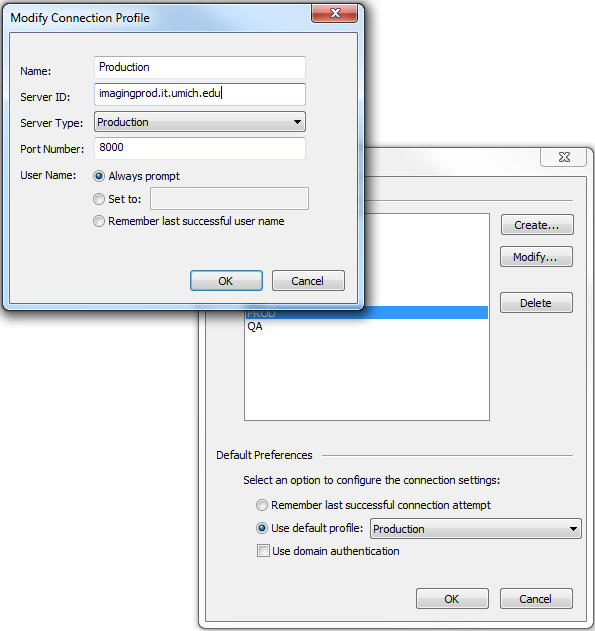
- Click OK.
- Select Production from the Use Default Profile drop-down menu.
- Click OK.