
Overview
Before You Begin
Review how to Add Live Data Content to Your Sign.
Review how to Configure the Layout of Live Data.
Markup Text
Markup text is a useful tool when designing live data objects. Often data is supplied to the sign as is, and it’s up to the sign designer to manipulate the values to appear as desired. The Markup Text option provides an avenue for the sign designer to do just that.
How to Add
Markup text is managed exactly like static text.
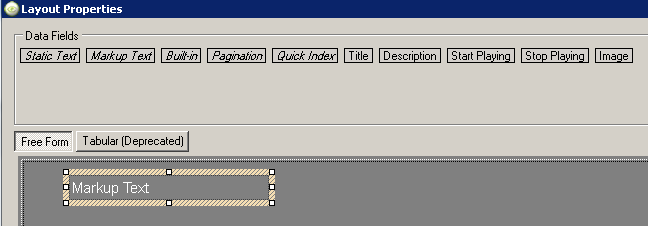
- Drag the Markup Text field from the header of the live data layout and drop it into the layout area.
- Right-click the field and select edit properties.
- Click on the field to edit the text.
Note Editing the text is where markup text starts to differ from static text. Markup text allows the addition of any of the fields from the live data object. That is, any field from the data source that can be dragged and dropped into the layout area can be added and manipulated in a markup text field. To add an existing field, simply type the field name enclosed in curly brackets {}. When the player reads through the data source, it will substitute in the value from the data in to this markup text field. It can also be applied to variables.
Simple Example
The simplest example to illustrate the power of markup text is with uniqnames. What if your data source only included uniqnames, but you wanted to show the full email address and to be left aligned?
| darthvdr | -> | [email protected] |
| luke | -> | [email protected] |
| han | -> | [email protected] |
One option is to drag and drop the Uniqname field into the layout area and then add a Static Text field containing “@umich.edu”, but this tends to look bad, as spacing varies based on the length of the uniqname:
| [email protected] |
| luke @umich.edu |
| han @umich.edu |
If you align the Uniqname field to the right, you lose the overall column being left aligned:
| [email protected] |
| [email protected] |
| [email protected] |
Using markup text, we can achieve a left-aligned look that includes the "@umich.edu" on the end.
Drag and drop a Markup Text field and enter:
{uniqname}@umich.edu
The result is the player displays whatever is in the Uniqname field of the data set immediately followed by "@umich.edu":
| [email protected] |
| [email protected] |
| [email protected] |
Additional Examples
Markup text is used in many places besides uniqnames to format data to appear as desired. Below is a list of common applications with data, the formatting of the markup text, and the final result.
Names
| Last Name | First Name | Markup Text | Result |
|---|---|---|---|
| Calrissian | Lando | {Last Name}, {First Name} Mr. {First Name} {Last Name} |
Calrissian, Lando Mr. Lando Calrissian |
Dates/Times
| Start | End | Markup Text | Result |
|---|---|---|---|
| 1/1/2015 | 1/5/2015 | {Start} to {End} From {Start} to {End} {Start} – {End} |
1/1/2015 to 1/5/2015 From 1/1/2015 to 1/5/2015 1/1/2015 – 1/5/2015 |
| 1:00PM | 3:00PM | {Start} to {End} From {Start} to {End} {Start} – {End} |
1:00PM to 3:00PM |
Pulling Images Into Live Data
Markup Text allows the content manager to add any type of additional text before or after the contents of a Data field. The most common application of this is to append file paths to the beginning of file names. That is, we can direct the software to the location of an image to display as part of a live data layout.
To pull in images:
- Create a folder that is accessible to the player (grant access to the folder for the dsw-autologin-<unit> account). If you are in the health system, use the folder that will contain the Excel file for the live data.
- Add the images you wish to display to this folder. They can be any image format, but should be at least 72dpi.
- In your live data source, create a column and enter the image names.
- Create the live data object in the Content Manager.
- Drag and drop a Markup Text field into the layout area
- Enter the UNC path followed by the image column name: \\UNC_Path\Folder\{Image Column Name}.
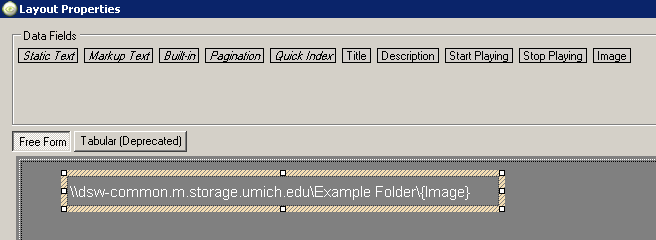
- Example: \\dsw-common.m.storage.umich.edu\Example Folder\{Image}.
- UMHS Example: \\blue.umhsnas.med.umich.edu\umms-digitalsign\UNIT\Folder\{Photo}.
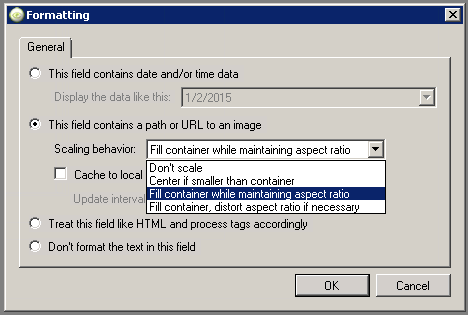
- Once you have entered the path, right click on the Markup Text field and go to formatting.
-
Select the option that states – this field contains a path or URL to an image file, display the image instead.
-
Select a scaling option for the images – typically users choose to fill container while maintaining aspect ratio.
Expressions
Expressions are advanced forms of Markup Text. Similar to Markup Text, expressions can be used to modify live data. Expressions go a step further in allowing modification of how the actual data appears on the screens. They also provide an effective method of if-then logic. This can be extremely useful when certain things need to happen based on the data. Expressions can also be used in scripts and with variables.
How To Use Expressions
As stated above, expressions can be used to modify live data or perform if-then logic. Expressions are written in one of the following formats:
{&exp:<logic>}
{&exp:<condition>?<result if true>:<result if false>}
Modifying Expression Examples
These examples illustrate some of the tasks expressions can perform. For each example, assume we have the following data:
- Live data column of name with value of Han solo.
- Player variable with name of date with value of October 13, 2015.
| Task | Function | Example Expression | Result |
|---|---|---|---|
| Uppercase a value | {&exp:upper([field])} | {&exp:upper([name])} | HAN SOLO |
| Lowercase a value | {&exp:lower([field])} | {&exp:lower([name])} | han solo |
| Title case a value | {&exp:title([field])} | {&exp:title([name])} | Han Solo |
| Generate a random integer | {&exp:random()} | {&exp:random()} | random integer |
| Generate a random bounded integer | {&exp:random(#)} | {&exp:random(30)} | random integer between 0 and 29 |
| Create a date from a string | {&exp:date(<string to interpret>)} | {&exp:date([&var:date])} | 10/21/2015 |
Expressions can also be used to modify player variables. If a value is stored in a variable, for example, the sign can increment that variable using the following expression:
Player.SetVariable(example, {&exp:[&var:example] + 1});
This script command tells the player to take the value stored in the variable example and replace it with the variable +1.
Conditional Expressions
Conditional expressions display the data based on a criteria. There are numerous examples of how to use this functionality.
Example 1: Display information based on the value returned from the live data.
In this example, the digital sign is pulling Magic Bus arrival times. If the time until the bus arrives is less than 2 minutes, the sign displays “Now arriving” rather than the expected wait.
| Expression | Results |
|---|---|
| {&exp:[avg]<=1?’Now Arriving’:[avg] + ‘ minutes out’} | avg <= 1 minute
|
Example 2: Display information based on a true/false value from the live data.
In this example, calendaring software is returning values for a room. The room can be occupied, unoccupied, reserved, or unavailable.
| Expression | Results |
|---|---|
| {&exp:[availablity]=’unoccupied’?’Available’:’Unavailable’} | availability = unoccupied
|
Example 3: Assign prefix or suffix based on title.
In this example, the sign is in the health system. It shows information about doctors and nurses. It pulls from a live data that has the person’s name in one column (name) and role in another (title). If the person is a doctor, the sign should show “Dr. <name>”. If the person is a nurse, the sign should show “<name>, RN”.
| Expression | Results |
|---|---|
| {&exp:[Title]='Dr.'?[Title]+' '+[First Name]+' '+[Last Name]:[First Name]+' '+[Last Name]+', '+[Title]} | Title = Doctor
|
Example 4: Hide Something
In this example, the unit does not want to show a tutor if he or she has no listed availability for that day. The data set contains a tutor name column and an availability column.
| Expression | Results |
|---|---|
| {&exp:[availability]=’unavailable’?’’,[Name] + ’Available from ‘ + [availability]} | availability = unavailable
|