
Overview
Before You Begin
Review how to Add Live Data Content to Your Sign.
Review how to Configure the Layout of Live Data.
Interactivity
There are several ways to incorporate interactivity in to live data layouts. These features allow for simple ways to navigate live data content. Interactivity can also be applied to data rows, which triggers actions specific to that particular row. For example, selecting a person in a directory can bring up details or map wayfinding routes to an office. This document assumes you have already created a live data object and are now working on the layout. The three types of interactivity with live data are:
Pagination
Pagination in live data allows the user to flip page-by-page through all the records in the live data set.
Live Data Layout
- Create a live data object and go to design layout view.
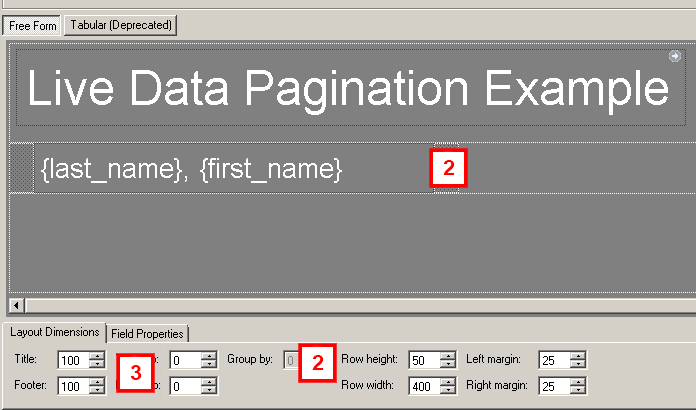
- Layout the rows (and columns if needed) to appear how you want them to on your sign.
- Leave space for a footer.
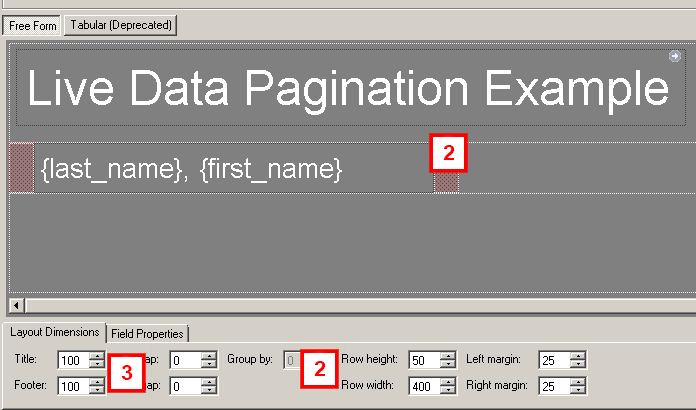
- Drag and drop a Pagination field into the footer. It makes the most sense to place the Next and Back navigation fields at the far left and right of the layout.

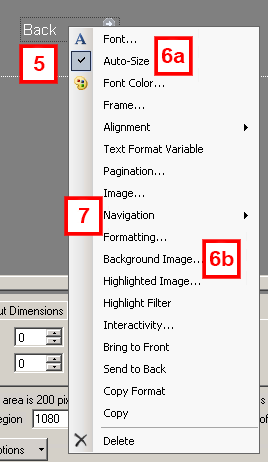
- Right-click or use the arrow to open the menu after the Paginationfield is placed.
- Alter the field to how you want it to appear.
- Change the font, font color, and alignment if you intend to use the default provided text.
- Delete the text and add a background image if you want an image such as an arrow for your back/forward button.
- Right-click or use the arrow to open the menu. Select Navigation to indicate if the Pagination is supposed to move forward or backward through the pages.
Quick Index
Live Data Layout
- Create a live data object and go to design layout view.
- Layout your rows (and columns if needed) to appear how you want them to on your sign.
- Leave space for a footer
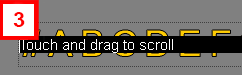
- Drag and drop a Quick index field to the footer. It makes the most sense to place the Quick index directly below the list of names. The default text in the Quick index will say "Touch and drag to scroll."
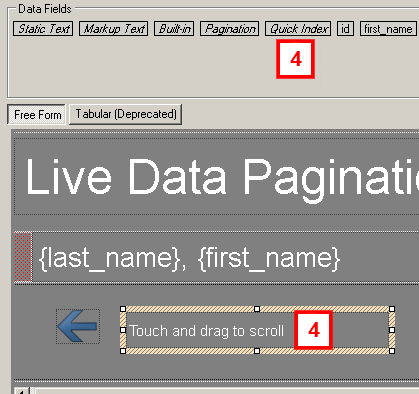
- Quick index works best when a background image is placed on it. Right-click on the Quick index field or use the arrow to open the menu.

Field Background
Live Data Layout
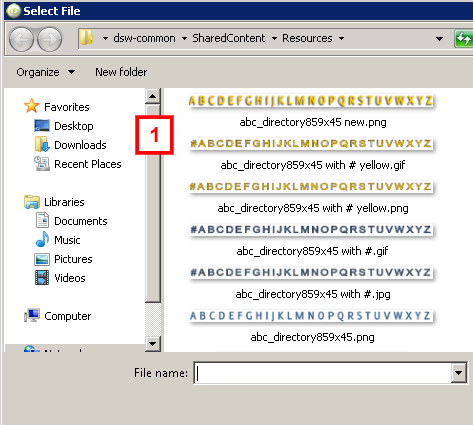
- Apply a background image containing evenly spaced letters of the alphabet and preceded by a pound sign. To assist you with this, ITS has several examples provided in the shared content repository: \\dsw-common.m.storage.umich.edu\dsw-common\SharedContent\Resources
- Once the background is chosen, click OK to return to layout view.
- Click the Quick Index field to activate editing and delete the default text.
- Click Enter to exit the edit mode.
- Right-click on the Quick index field or use the arrow to open the menu.
- Hover-over Field Name and click in the box that appears to the right.
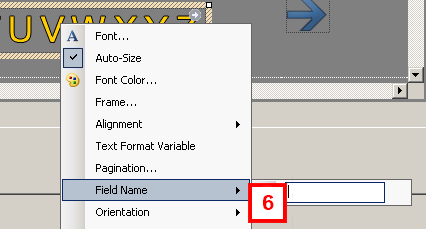
- Type the name of the field that you wish to paginate by. In a directory, this is usually the last name. The field you select must have a sort applied to it for the quick index to work. See the documentation on sorts, filters, and distinct for more information on creating a sort.
Interactivity in Regions
Interactivity can be applied to regions within a live data to enact behaviors on other regions on the sign. The most traditional application of this is to create actions on a directory list to display details or wayfinding information about the selected person. For an example with wayfinding, please read the wayfinding documentation. Interactivity to provide details is described below.
Live Data Layout
- In this example, there will be two live data objects pointed at the same data set. Create a live data object, place it in the applicable region of the template, and enter design layout view.
- Design this layout to appear how you would like the directory list to appear on the screen.
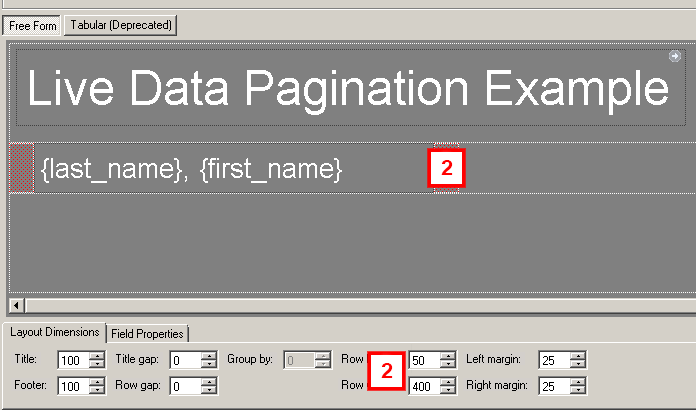
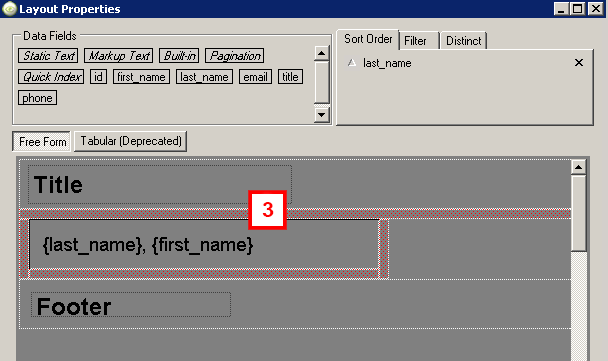
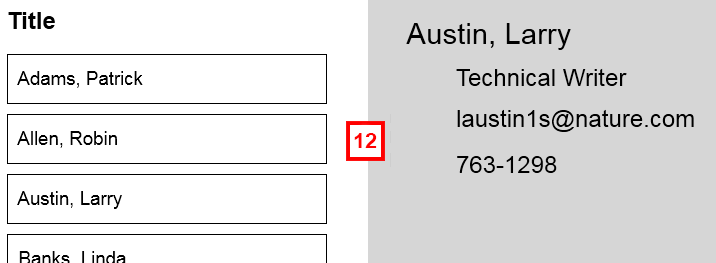
- In this example, the list will appear as it does to the left. For the list, a static header and footer were filled in. The rows contain a markup text with last name, first name enclosed in a black frame. The data is sorted by last name.
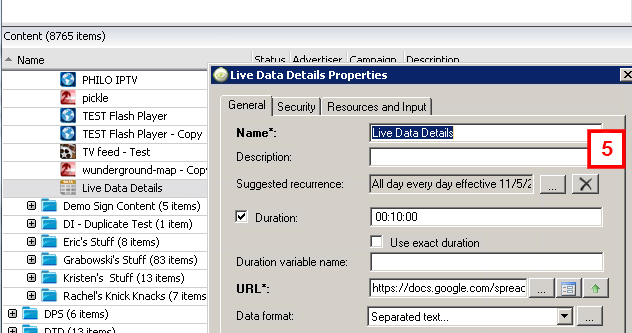
- Once the list of employees is created (or whatever the list will be of), create another live data object.
- In the properties, remove the suggested recurrence by clicking the X. This live data object will not play unless it is triggered to play via interactivity (someone selects a name on the list.
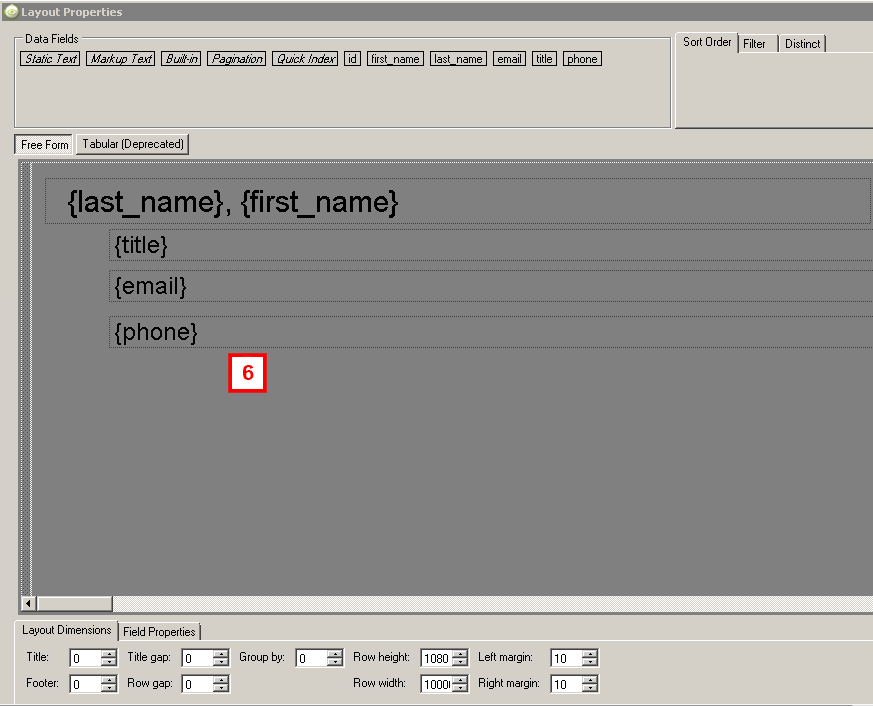
- Place this live data in a different region of the template. Enter layout mode, and design this layout to show the details for any particular individual. This layout will be one row only (as it will only show the details for the person selected).
- Now that both live data objects are added to the domain, enter the layout view of the list live data object. We will now add interactivity to the names.
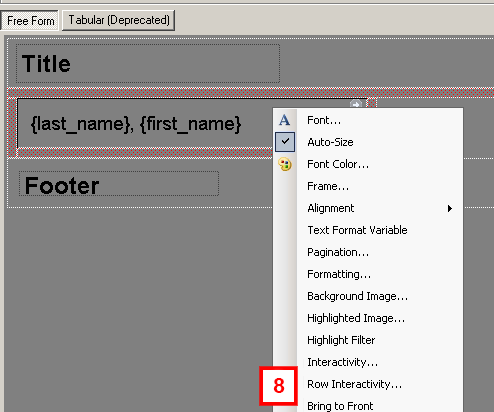
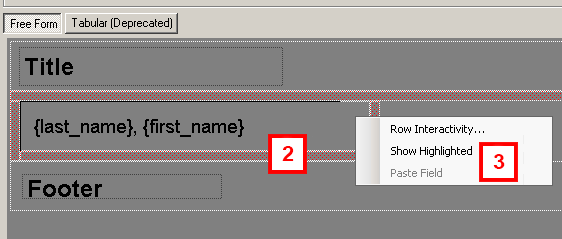
- Right-click anywhere in the row section of the layout and select Row Interactivity.
Note Interactivity can be placed in a region, but it is best practice to place it on the entire row in case the user misses the provided interactive area.
Click Behavior Window
- Click New in the Click Behavior window to add a behavior.
- The targeted template should be the current template
Note Interactivity could possibly pull up a different template if needed. - The targeted region should be the region containing the Detail live data object.
- The content to play should be in the Live Data Details object.
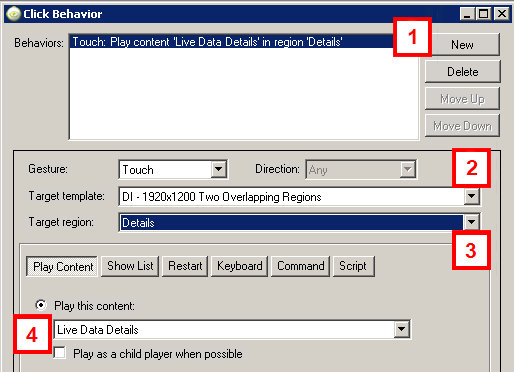 These steps will make the live data details play in the details region of the template, but it won’t show the correct name. It will show the first name alphabetically in the data source. We need to indicate to Four Winds Interactive which name we’d like to show the details for. Basically, we need to filter the returned results in the details section to only show the name we clicked. To do this, we need to add a Parameter.
 - Click Parameters at the bottom of the Click Behavior window.
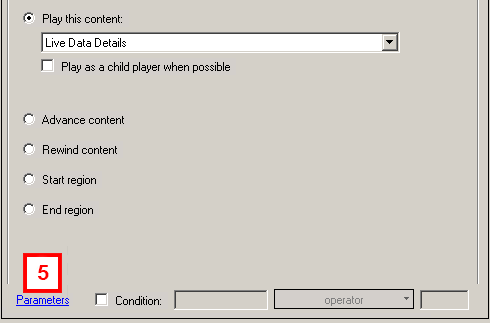
- Click New Parameter.

- In the fields that appear, indicate that you would like to filter the results.
- On the right indicate that you would like to filter the results.
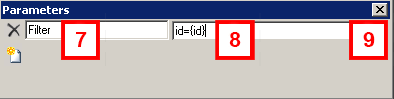
- Multiple Parameters are allowed, so filters can be applied to last name and first name.
- In our example, each name has a unique identifier, id. So, our Parameter filters the detail live data to show the id equal to that of the row we clicked in the list ({id}).
- Once the Parameter is set, click the Close button in the upper right.
- Click on the Click Behaviors window.
- Click OK in the live data layout window.
- Test the live data in preview mode. The list should appear in the applicable area. No details should appear until a name is selected within the list. Timing and duration is important here, as eventually you will want the details to blank back out. Give it a short duration of 2-3 minutes.
Extra Steps (optional)
Live data can be highlighted to indicate which option was chosen. This is called row highlight. Show highlighted is an option in live data to design a layout to indicate how a row will look if it has been selected.
- Click to open the live data layout window.
- Right-click anywhere in the row where a field does not exist.
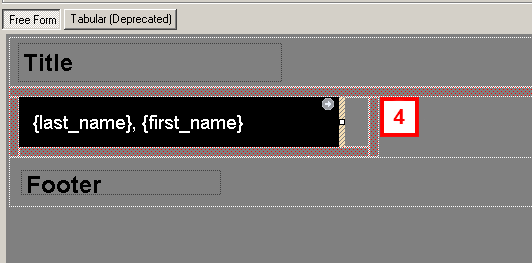
- Click Show Highlighted. This will show a blank layout area that you can design in (just as if you were designing the regular layout). This design will be how a row looks when selected.
- Design the layout how you want to appear when the row is selected. In this example, we reversed the colors to black background with white text.
- Click OK to save the layout.
- Preview the layout and select a Title to ensure it looks how you would like it to.
