
Overview
At the end of 2014, Google ended support for its earlier API features that allowed the ITS Digital Signage software to pull calendar data. As a result, many signs immediately stopped functioning. To resolve the problem, many calendars were made public, but this method resulted in data that was not separated into individual tags. The description, date, start time, and end time were condensed into a summary tab, making live data usage impractical.
The Google Calendar API provided the answer to pulling the data from the calendars. This requires multiple steps and public access to the calendar, but it does make the calendar resource a bit easier to navigate with Live Data.
Note Before you begin, you must create at least 1 template and 1 region before you can add content of any type to your player. See Digital Signage: Creating a Template.
Make the Google Calendar Public
- In Google Calendar, select Calendar settings from the calendar's drop-down list.
- Note the Calendar ID located on the Calendar Address row. You will use it later on in this process.
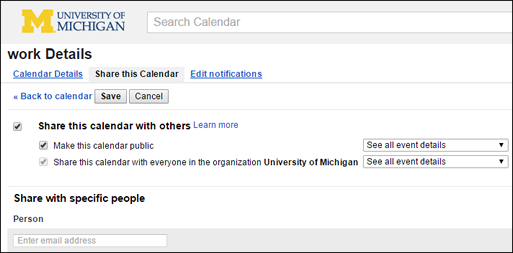
- Click the Share this Calendar tab.
- Check the Share this calendar with others and Make this calendar public boxes.
- Select See all event details from the drop-down list next to Make this calendar public.
- Click Save and then click Ok if a prompt appears.
Configure the Google Calendar API
- Go to the Google Developers Console and create a project.
Note: you may need to create a developer account. See the Developers Console help page. - Open the project, expand the APIs & auth section and click APIs.
- Under Google Apps APIs, click Calendar API, and then click Enable API.
- Click the Credentials link under APIs & auth menu on left hand side.
- Click Create new Key under Public API access.
- Choose Browser Key when prompted for a type.
- Click create.
- Note the API key for later use.
Configure a Live Data Content to Read the Calendar
- Open Content Manager and your specific unit.
- Right click on your content folder, choose create new content in category and then select Live Data.
- Complete the Live Data information. For the URL, click dynamic URL
 .
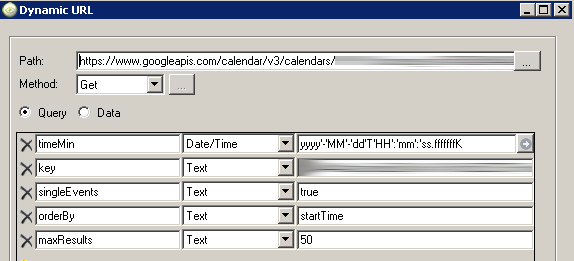
. - Enter the calendar URL as follows: https://www.googleapis.com/calendar/v3/calendars/calendar id/events
Note: calendar id was gathered earlier in the steps, but can be found again by going to calendar settings in Google - Add criteria to the dynamic URL as follows:
- timeMin - Date/Time
- yyyy'-'MM'-'dd'T'HH':'mm':'ss.fffffffK
- key - Text
- API key value
- singleEvents - Text
- true
- orderBy - Text
- startTime
- maxResults - Text
- 50
- timeMin - Date/Time
- Use the test button to verify that the URL is functioning.
- Change the deployment behavior to Don’t copy this resource - use the network location.
- Click OK to return to the live data object window.
- On the live data object window, change the data format to JSON.
- When prompted for a SelectToken, type "items" and press OK.
- Click OK to complete the live data object.
- Drag the live data object to the appropriate region on your sign.
- Right click the live data object once it is in the template and choose edit layout to begin laying the calendar item.
Manage the Data
The data returned from the Google Calendar looks like this:
- summary: Special Event
- start: { "dateTime": "2015-03-31T10:00:00-04:00”
- end: { "dateTime": "2015-03-31T16:00:00-04:00”
The dates are merged with the time and are preceded by { “datetime”: “. Sorting will still function on the start and end time correctly, but the formatting causes problems with displaying the dates and times separately. However, we can identify where the data is we desire, and it will fall in the same location each time due to the formatting, which means we should be able to extract it from the string:
- { "dateTime": "2015-03-31T10:00:00-04:00”
To pull the data out, we need to pinpoint what we need and eliminate the remainder of the string. For the date, that means the 10 characters after character 18.
- [ 18 | 10 ]
- { "dateTime": "2015-03-31T10:00:00-04:00”
In the layout of the live data object, we use a markup text field to pull out this data. Drag down a markup text field and type {start|_mid(18,10)}
Note You can also drag down other fields, such as description and location.
Essentially, this markup text says - bring in the data from the start field and only display the 10 characters after character 18. The result is 2015-03-31:
This result is a date and time. The field can now be right clicked on, formatter, and set as date/time to be displayed as desired:
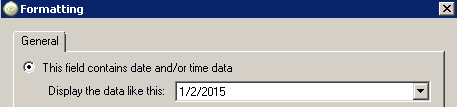
Resulting in: 3/31/2015
A similar approach can be used on the time: {start|_mid(29,8)}
Will pull out the 10:00:00, which can be displayed as 10:00 AM using the same steps as above. The end field can be treated the same way. The result is a layout with a title, date, start time, and end time. An example of this is here:
