
Overview
Important Information
In order for this process to work, you need to know:
- The data source (typically a server name).
- The location of the data source (typically a database name).
- A specific user name and password used to authenticate your logon (via the content player) information to the data source.
- The SQL statement that you will be using to extract the data.
(You may need to work with a local IT administrator to obtain this information.)
This process includes working with Joined Data Sets, which provide a means for appending information to rows of live data that have been returned from a primary source. This ability is useful, for example, when:
- The main data source provides a list of events and locations from an event management system and a secondary data source contains a list of directional icons that are used to help direct guests to the appropriate venue.
- The main data source provides a list of presentations and speakers and a secondary data source contains photos and biographical information for the speakers.
- The main data source provides a list of meetings scheduled in combined meeting rooms and a secondary data source associates the combined rooms with their corresponding individual meeting rooms.
Joining a master live data source with one or more joined data sets results in a single merged result set that can be filtered, sorted, grouped, etc just like any other live data content item.
Step-by-Step
- Log into Content Manager
- Sign into the Digital Signage software. Instructions are on the Digital Signage site.
- Launch Content Manager.
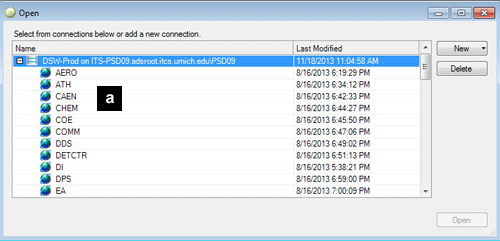
- Select a Connection
- Select the appropriate connection for your Unit.
- Select the appropriate connection for your Unit.
- Create the Live Data Object
- From the Content category in the Content section of Content Manager, right-click on the Content category for your Unit, select “New Content in This Category <name of category>", and select “Live Data”.
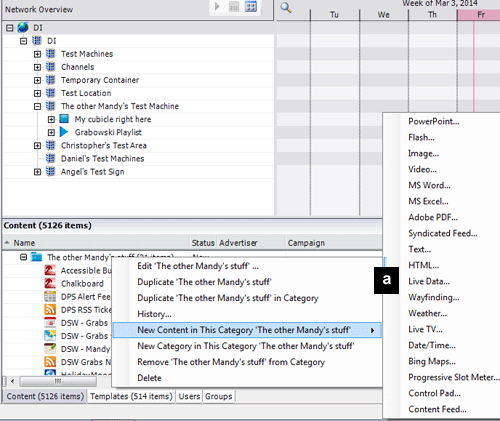
- From the Content category in the Content section of Content Manager, right-click on the Content category for your Unit, select “New Content in This Category <name of category>", and select “Live Data”.
- Configure the Template Properties
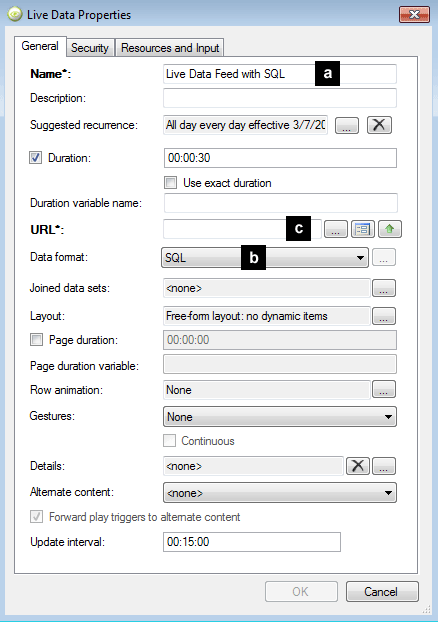
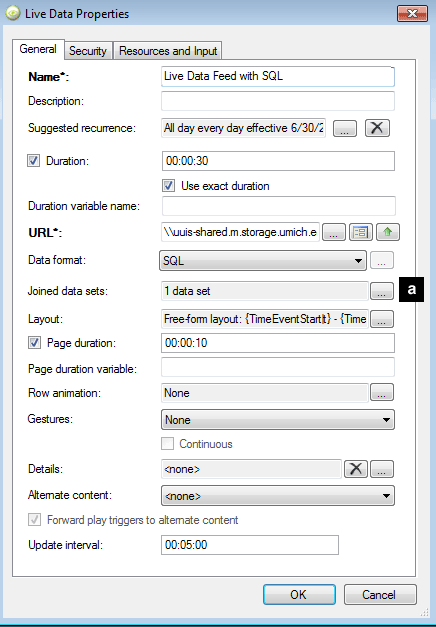
In the Live Data Properties window, there are several fields that need to be configured:
- In the Name field, enter a name that you will easily recognize.
- In the Data format drop-down, select SQL.
- Click the Dynamic URL icon to the right of the URL field to access the Dynamic URL dialog box.
- Configure the Region Properties
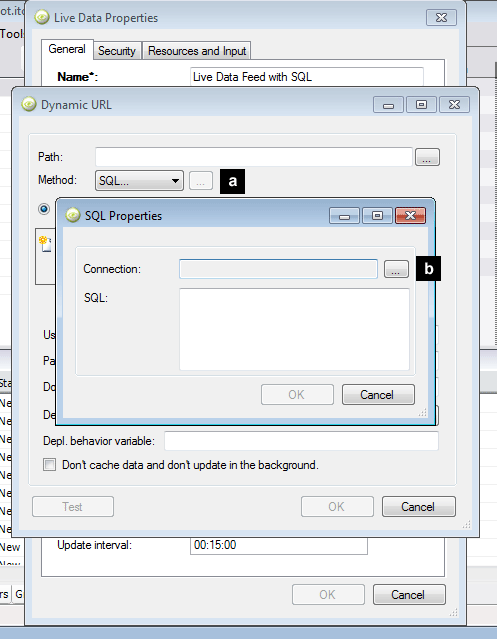
In the Dynamic URL dialog box:
- Select SQL from the Method drop down. This will bring up the SQL Properties dialog box.
- Click the ellipsis icon to the right of the Connection field.
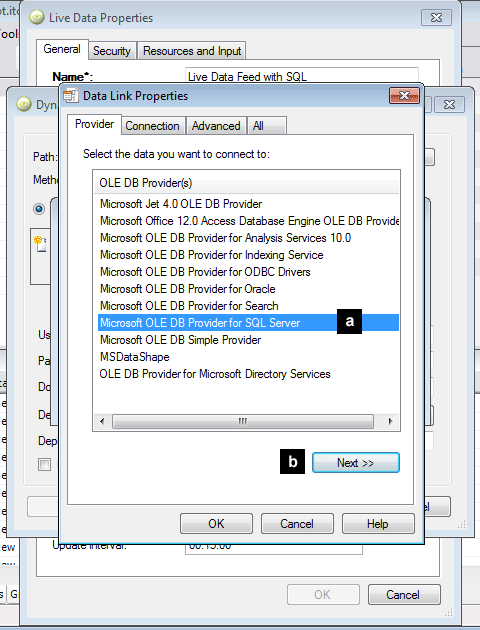
- Configure the Data Link Properties
In the Data Link Properties dialog box:
- Select Microsoft OLE DB Provider for SQL Server.
- Click Next. This will take you to the Connection tab.
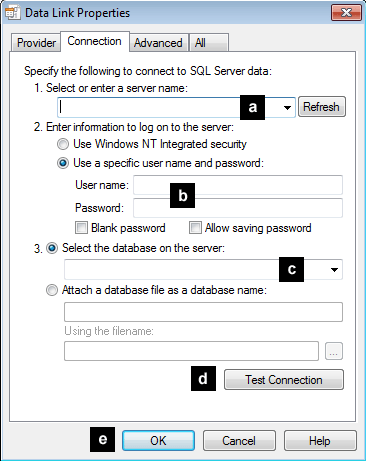
- Configure the Data Link Properties (continued)
In the Connection tab, which allows you to specify where your data is located and how to connect to the data:
- Enter the Server name.
- Enter the User Name and Password.
- Enter or select the Database on the server (if the server name has been entered correctly, there will be databases to choose from with the drop down menu).
- Click Test Connection to confirm that the settings you’ve entered are correct.
- Click OK to return to the SQL Properties dialog box.
- Configure the SQL Properties
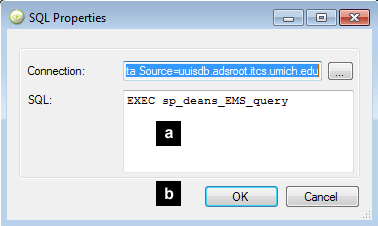
In the SQL Properties dialog box, you will now see the connection string in the Connection field.
- In the SQL field, enter the SQL statement you will use to extract the data.
- Click OK to return to the Dynamic URL dialog box.
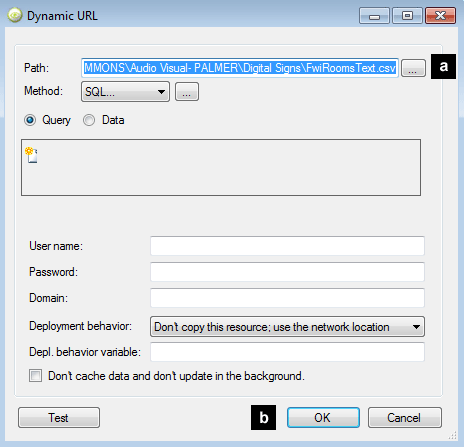
- Set the Dynamic URL
The Dynamic URL is used in cases where a secondary data source needs to be joined with the primary Live Data source to provide the complete set of information to display, sort or filter.
- If you have such a secondary data source, click the ellipsis icon to select the associated file. If not, leave this field blank.
- Click OK to return to the Live Data Properties dialog box.
- Access the Joined Data Sets Info
- In the Live Data Properties dialog box, the Joined Data Sets field should now indicate that there is a joined data set. Click the ellipsis icon to the right of this field to go to the Joined Data Sets window.
- In the Live Data Properties dialog box, the Joined Data Sets field should now indicate that there is a joined data set. Click the ellipsis icon to the right of this field to go to the Joined Data Sets window.
- Access the Data Format Tab
Joined Data Sets provide a means for appending information to rows of live data that have been returned from a primary source.
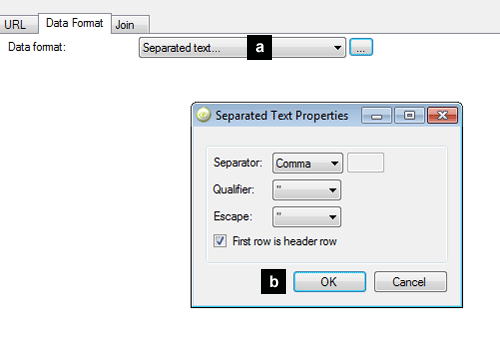
- In the Joined Data Sets window, you will see the designated file path in the Path field. Click the Data Format tab.
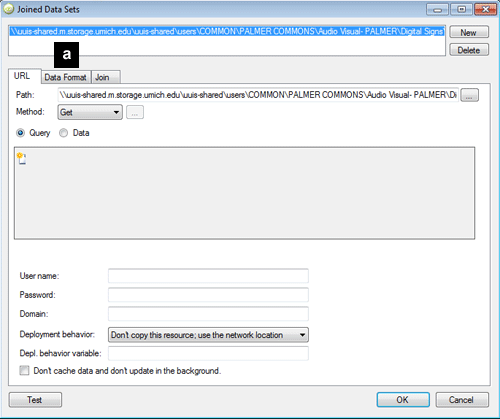
- In the Joined Data Sets window, you will see the designated file path in the Path field. Click the Data Format tab.
- Configure the Separated Text Properties
In the Data Format tab:
- Select “Separated text…” from the Data format drop down to bring up the Separated Text Properties dialog box.
- Confirm the properties, and click OK to return to the Joined Data Sets window.
- Join the Fields
In the Joined Data Sets window:
- Click the Join tab.
- Select the Join type (inner or outer).
An inner join returns a row of data for each instance in which a row from the master data set finds a match in the secondary data set. If there are multiple matches found, each of them returns its own result row.
An outer join returns all the rows in the inner plus an additional row for each master row that did not match anything in the secondary data set.
- Select the two fields that you are trying to merge.
- Click Add.
- Confirm the Joined Fields.
- Click OK.

- Access the Layout Properties
- In the Live Data Properties dialog box, click the ellipsis icon to the right of the Layout field to go to the Layout Properties window.
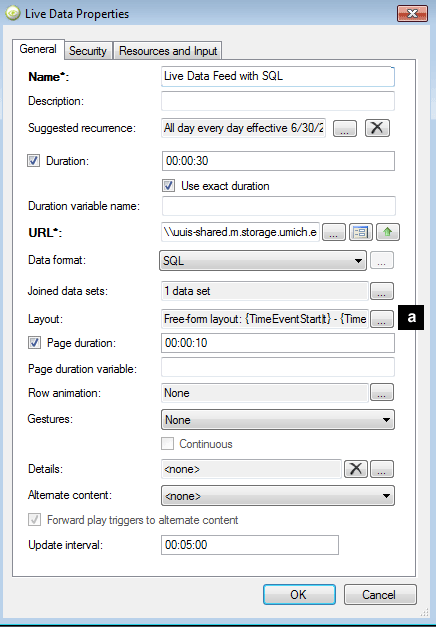
- In the Live Data Properties dialog box, click the ellipsis icon to the right of the Layout field to go to the Layout Properties window.
- Configure the Layout Properties
At the top of the Layout Properties window, you should see the data fields from the SQL statement.
- Configure the layout properties for the region where the Live Data object will display on the sign.

- Configure the layout properties for the region where the Live Data object will display on the sign.
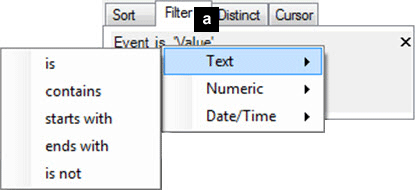
- Add Filters
In the Layout Properties window, you can also add filters that let you specify which information to include on the sign (effectively excluding other data).
- To add a filter, click the Filter tab in the top right corner of the window. You can then drag-and-drop data fields into this area to add them. After adding a field, hover over "is" and "value" to select parameters.
- When you are finished setting up filters, click OK to return to the Live Data Properties window.
- Complete Setup
- Once everything has been configured, click OK to save the Live Data Properties.
- The final step is to drag the new Live Data content object from the Content area of Content Manager into the Network Overview, specifically, in the region you’ve designated in the template for this content object.
