
Overview
Using the ITS Digital Signage software, text is the primary content object used for displaying titles and static text content on digital signs. The Text content accepts both standard (Notepad) and Rich Text (Word Pad) formats. Since the content object has a field for adding free form text, no external file is needed, although you can still link a text object to a text file if desired.
Before you begin, keep in mind:
- The supported file types are .txt and .rtf
Note MS Word and PDF files will not play - The default font color is white
Note If the background of the region where the Text content will display is white, change the font color, or region's background color - You must create at least 1 template and 1 region before you can add content of any type to your player.
Video Instruction
This video (2:30) shows the information listed in the rest of this document.
Create a Text Content Type
- Launch Content Manager and open your connection
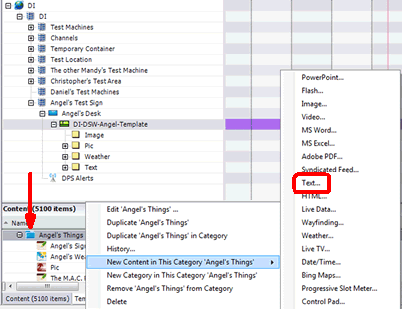
- In the Content section of Content Manager, right-click on the Category and select New Content in This Category > Text
Note This opens the Text Properties dialog
Configure the Text Properties
In the Text Properties dialog, there are several fields that need to be configured:
- Enter a Name for your Text content.
- Enter a Description (optional). If you wish to display multiple Text content items on your sign, this will help to identify which is which.
- Adjust the Suggested recurrence as needed. This controls when the content is played on the player.
- Adjust the Duration as needed. (The default is "All day every day.")
- If you have a short piece of text to display, you can enter the exact Text in this field.
- If you have a longer piece of text to display, you can enter the URL of a text file (file type must be .txt or .rtf - and will override any text you've entered in the Text field) using either of these two methods:
- The
 button opens the File Selection dialog, where you can browse to locate your file.
 - The
 button opens the Dynamic URL dialog, where you can type or paste the location of your file into a text bar without having to navigate through Windows. (If you prefer to navigate to your file manually, there is an ellipsis button available at the end of the text bar.)
Note The advantage of using a Dynamic URL is that it lets you decide whether your content should be downloaded to the machine at the time of deployment or be played from its current location. This is useful when working with live data objects or other objects that update/change over time.
- The
- Click OK to save your Text content type.

Add the Content to a Region
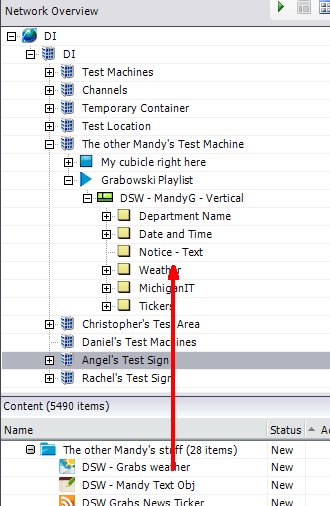
- Once your Text content has been added to the Content section for your department, you can click on the newly created Text content and, while holding down the left-click mouse button, drag it up to the region on your sign where you want the content to be displayed.
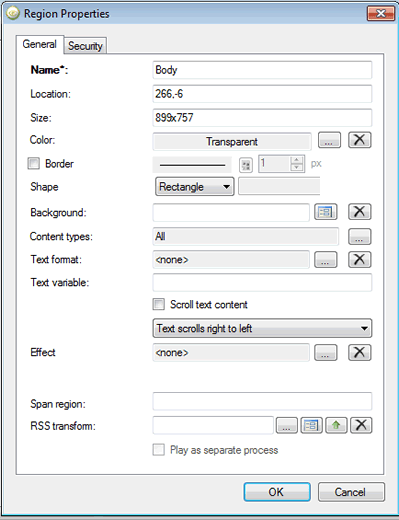
- In the Region Properties dialog, there are several fields that need to be configured:
- Enter a Name for the Region where your Text content will display on the sign.
- Enter a Color if you want the Region to be a specific color. The default is Transparent.
- Add a Background image if you'd like.
- Adjust the Text Format options (e.g., font, size, color, frame and text alignment) if you like.
- Check the Scroll text content checkbox if you want your Text content to scroll across the Region. The drop down menu allows you to configure the text to scroll right to left or left to right.
- Click OK to close the Region Properties dialog.
- Save and deploy your sign content.