Overview
With the ITS Digital Signage software, the Image Content type allows you to add pictures and logos to your sign. You can use your own image or choose from a collection of commonly used graphics located in the Shared Content
- Images that have transparency or animation will retain that feature on the digital sign.
- Supported file types are: .png, .jpg, .gif, .bmp, .tiff, .wmf, .tga, .targa.
- File formats supported are: .xls and .xlsx
- You must create at least 1 template and 1 region before you can add content of any type to your player. See Digital Signage: Creating a Template
Step-by-Step
- Launch Content Manager and open your connection.
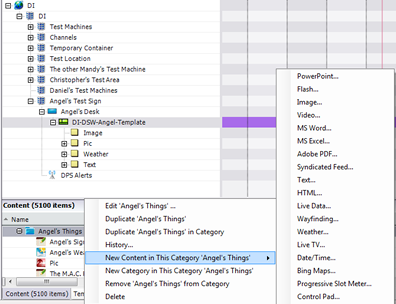
- Right-click your content category and select New Content in This Category > Image.
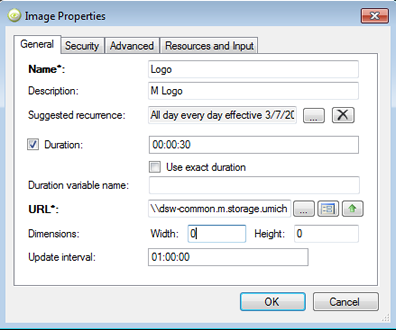
- Set the image properties:
- Enter a Name for your Image Content
- Enter a Description (optional)
- Adjust the Suggested recurrence as needed
- Adjust the Duration as needed. (This is how long the Image will play if you have more than 1 piece of content in in the region where you add the Image content.)
- URL – Use:
 button to open the File Selection dialog, or
  button to open the Dynamic URL dialog.
 - Update Interval – How often the content looks for updates from the source file.
- Set the scaling on the Advanced tab. Scaling allows you to define how the image will be scale within the region where it is placed on your digital sign. The option are:
- Don’t scale = Keep the image the same size regardless of the region size. The image will be placed in the upper left hand corner of the region.
- Center if smaller than container = If the image is smaller than the region the image will be centered within the region.
- Fill container while maintain aspect ratio = The image will increase/decrease in size as much as possible to fit within the region while maintaining the ratio of the image. (This option is most recommended)
- Fill container, distort aspect ratio if necessary = The image will be resized the fill the region completely. This may result in the imaging being distorted and unrecognizable as the ratio aspect is ignored
- Click OK on the General tab to save your Content Type.
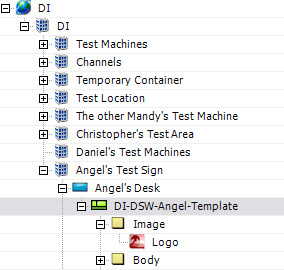
- Once your Image content has been added to the Content section for your department you can click on the newly created Image Content and while holding down the left click mouse button drag it up to the region on your sign where you want the Image to be displayed.
Example