
Overview
With ITS Digital Signage, Date/Time content allows you to display date and time information on your sign, formatted to your specification. The properties you must set are explained in this document. The actual date and time information displayed is read from the player machine’s internal clock.
Video
This video (3:32) shows how to add date and time to your digital sign.
Step-by-Step
The same information from the video, above, is explained in a numeric step-by-step format.
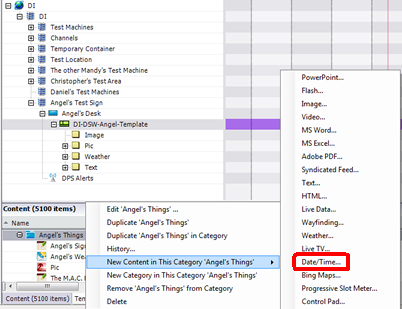
- Log into Content Manager and select your unit's connection.
- Right-click the Category used by your Unit and select New Content in This Category > Date/Time.
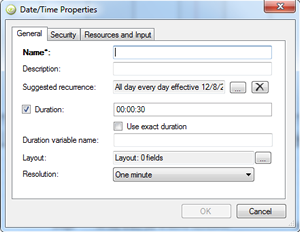
- In the Text Properties window, there are several fields that need to be configured:
- Name: This is the name of the Date/Time content item.
- Description: Optional. Used to further describe the content item. If you wish to display multiple Date/Time content items on your sign, this will help to identify which is which.
- Suggested Recurrence: Controls when the content is played on the player.
- Duration: The default is “All day every day effective (when you create the Date/Time content item), and does not need to be changed.
- Layout: Click the ellipsis button to see the layout.
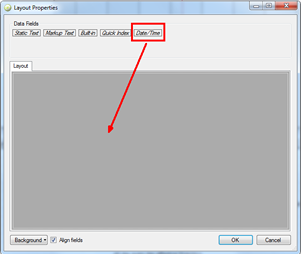
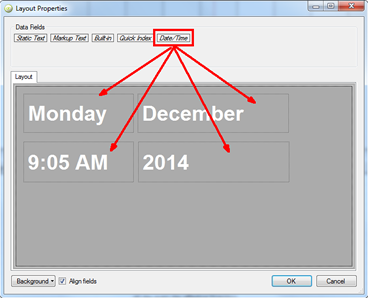
- In the Layout Properties window, drag the Date/Time data field into the Layout box.
- Right-click in the date/time item and select Formatting.
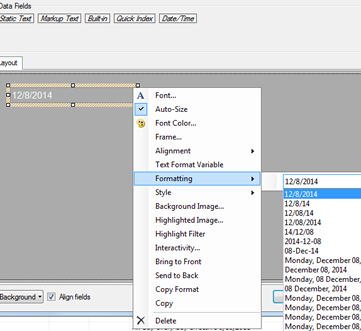
Note If you wish to have multiple Date/Time content items, you just keep dragging down the Date/Time data field wherever you want. For example, you want to show the Day, Year and Time all in different places on your sign.
- Click OK.
- In the Network Overview, drag the content item from the Content up into the desired region of your sign.
- Save and deploy.